Smallest keyboard layout

Smallest keyboard layout possible is called 40% keyboard. It has about 40 switches, and those are all letters and couple of necessary keys for writing, like space, enter, backspace... In order to make something like that keyboard, a microcontroller with HID capabilities is required. In my case i used STM32F103 aka Bluepill.
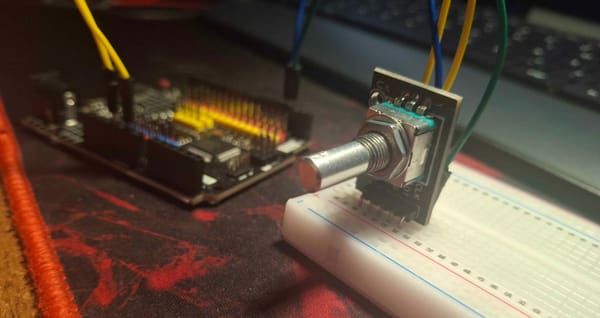
It's possible to just buy one of those development board really cheap from China, and hand wire all the key switches to it and there is the keyboard. The problem with that kind of assembly is that it's unnecessarily bulky. It's too fat for my taste. The Cherry MX keyboard switches that i intend to use are bulky enough by itself, and when added a centimeter or so to it, it's really high for hand placement.
The solution to that in my case is designing a PCB that will hold microcontroller and all the key switches. That's actually the reason i want to make the smallest keyboard possible. If the 40% is built successful, then i can take same microcontroller, and it's subcomponents and just copy those to new PCB and add a few more rows of key switches.
What's the actual way that PCB will be made? KiCAD is the key. KiCAD will do almost half of the job for me.
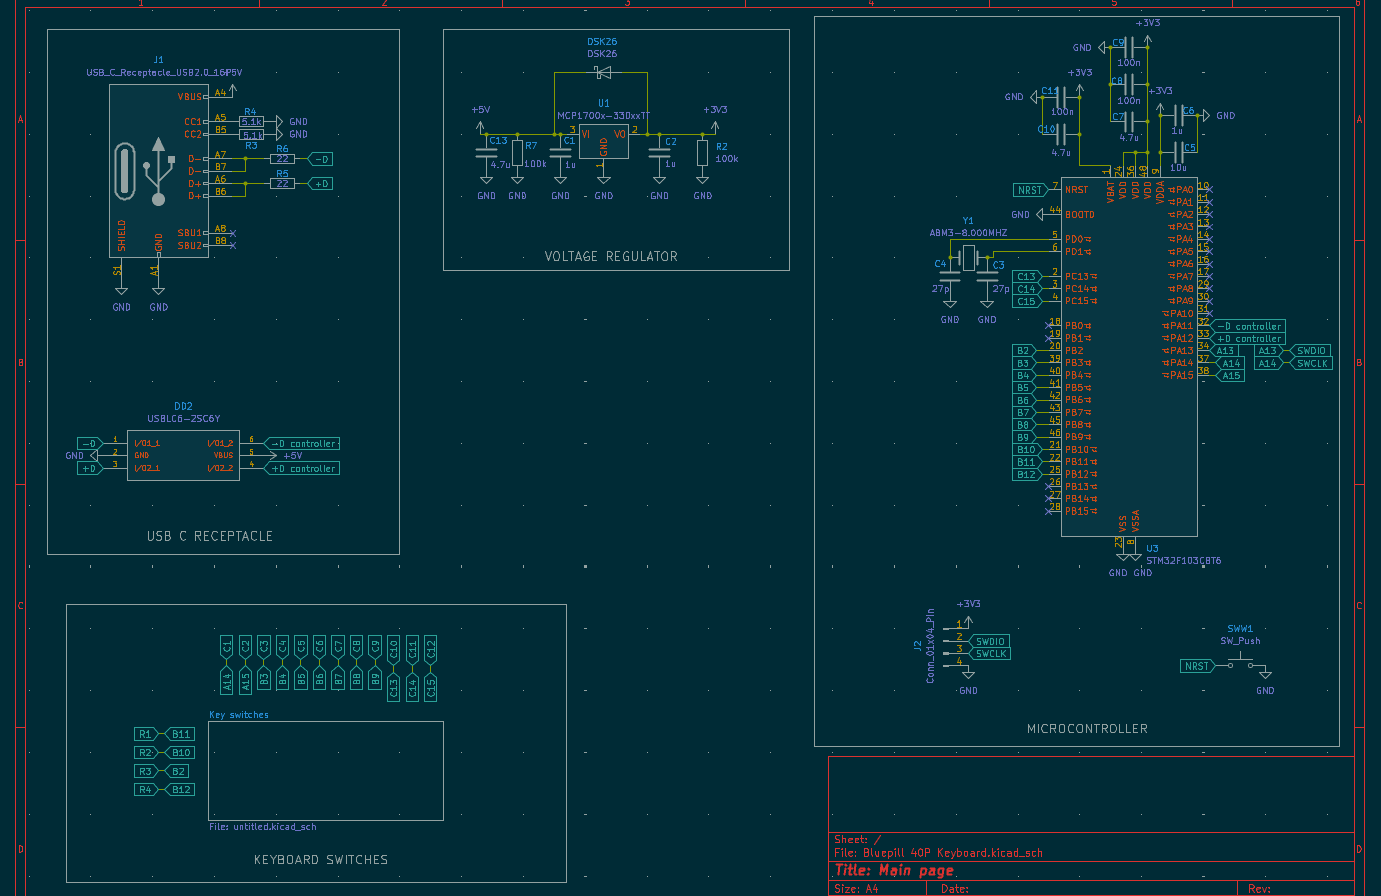
The main schematic is actually easy enough. If one does not know, or has a hard time selecting and designing a schematic. There are a lot of open source keyboard schematics that can be used as a reference, or just copied. I found a lot of those on Github, and after i finish this project completely i will upload it to Github so it's available to others after me.
Now onto the actual keyboard layout. There is a great tool on the internet that will plan everything out, and in case i want to change that plan a little, i can do it. It's keyboard-layout-editor.com , a tool that will plan out a keyboard, and then a plugin for KiCad can interpret that exact plan and position components on the PCB for me. The problem with keyboards is how those keys are positioned, it's not a perfect grid.
All the rows are misaligned, and I'm not sure why is that. Perhaps that's how someone who first created a keyboard did it, and then everyone just copied. At the end of a day I'm copying it xD. Onwards.
Keyboard footprints placer is a plugin for KiCAD that takes the layout that keyboard layout editor made and it just places all the keys in the order it's planned.
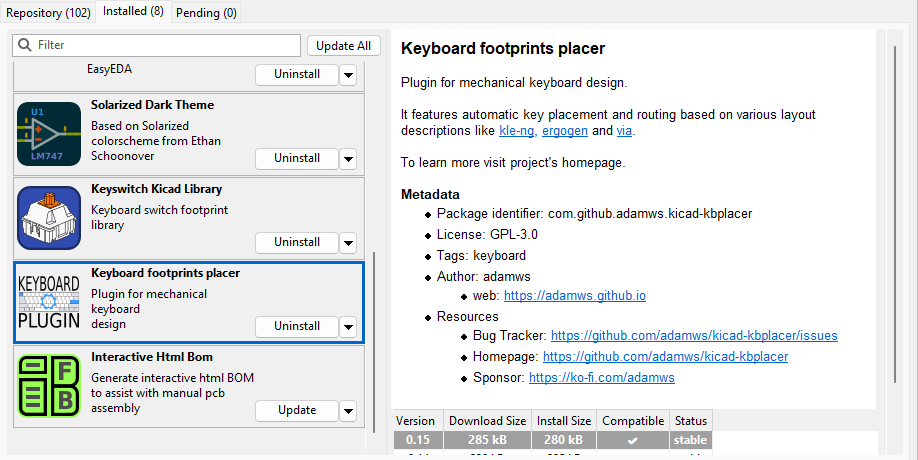
One more thing for creating that layout is keyboard switch PCB footprints. For that there is one more KiCAD plugin called Keyswitch Kicad Library. It adds all the major key switch footprints, so only thing left is to assign those footprints. And after all the keys are in proper order, the only thing left is to position microcontroller and other components.
Run all the traces, remove all the error that occur, and recommendation is to draw ground planes, so weird inputs never happen. To be honest i don't know the exact details of what happens if good ground connection is not implemented. Only thing is certain, is that if ground trace is not connected where it should be, the component just won't work, and if it's not connected or connection is broken from USB receptacle to components, then a whole keyboard just won't work. And after routing which is actually the most time consuming part of this process.
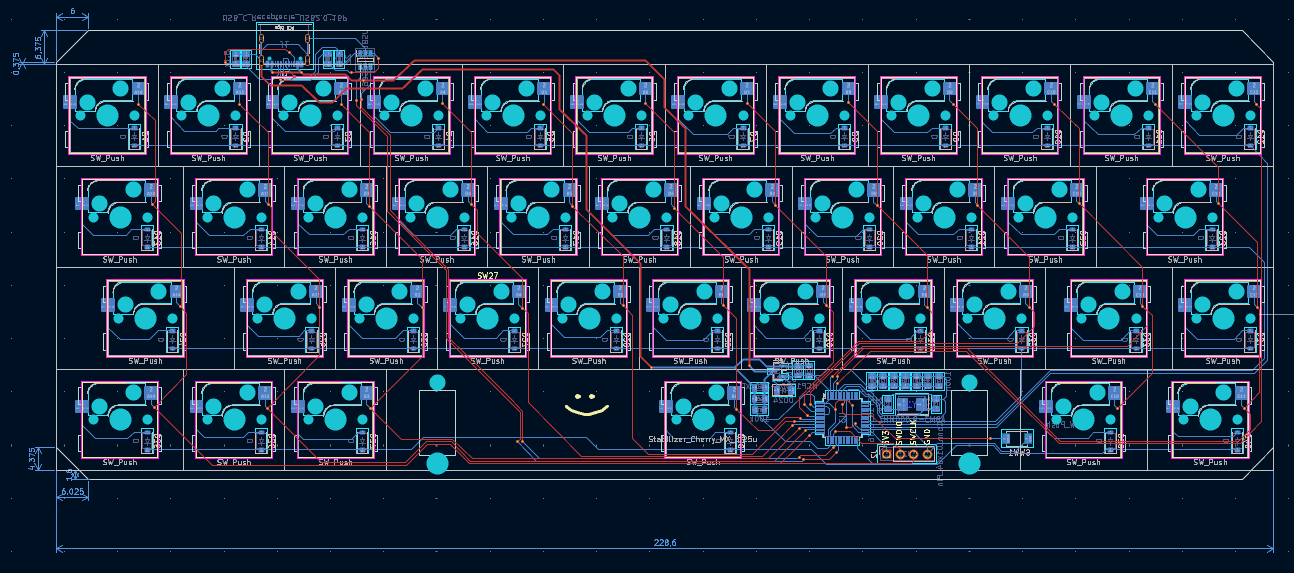
The finished board looks like this:
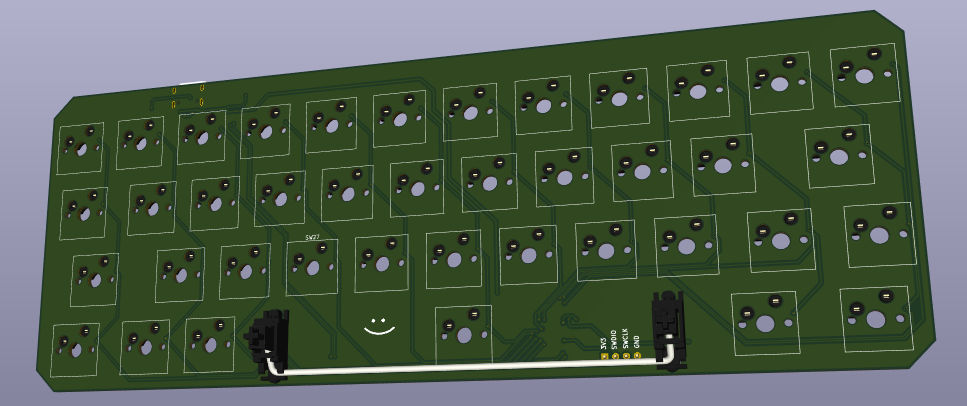
I rounded the corners a little so it looks cool :). The problem i encountered is that there was no place at the top of the keyboard to place a USB-C receptacle, so i extended PCB a little on top so USB can fit. Even though the goal is to make those sides as small as possible, so they dont poke out too much when keyboard is assembled, i think when keyboard has a bit bigger top part, it still looks cool.
Plans after the PCB is in:
Assemble the whole PCB, currently 5 units is ordered, my guess is i will screw one or two in soldering, and others should work. If everything goes well, produce another keyboard PCB. This time 65%, that one is my favorite, and with that order more 40% PCBs, maybe improve on this design if flaw are discovered.
That's it, thanks for reading.