E-paper clock (idea)

A small e-paper screen that displays current time.
It's not connected to the internet, instead it has its own RTC IC and you set it as any normal wall clock, but it does not go on the wall. It will have two AA batteries. Considering how epaper consumes small amount of energy, two AA batteries should last a long time.
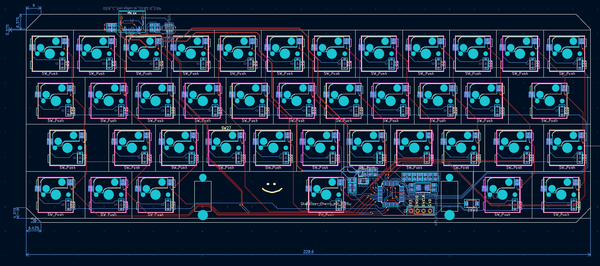
In order to stay consistent with the story, I need to tell it from the beginning. About a month ago I already designed and printed the board for the clock, but it did not work.
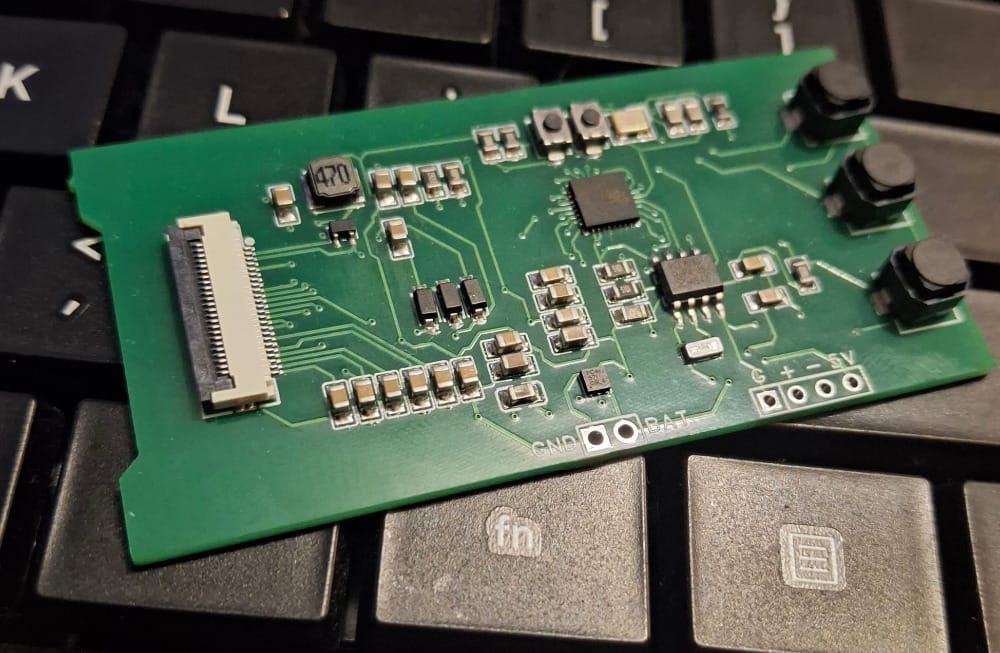
I decided to solder component myself with soldering paste, stencil and hotplate. But each time I assembled it, something didn't work. The problem was probably in the soldering of a microcontroller and it's package. I picked ESP32 C3 because it had widespread learning resources, and was popular. But I did not account for how small it is and how small soldering pads it had. Adding to that soldering pads were underneath the chip. So the project was started all over.
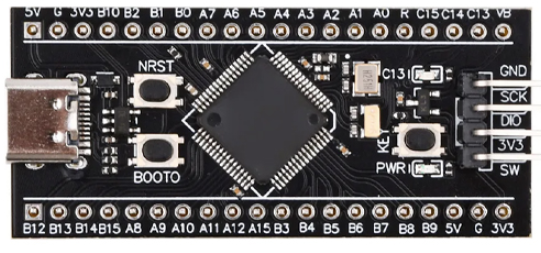
Now for the microcontroller I will use stm32f401 aka black pill. Considering how blackpill has enough ram for displaying the image, and can handle the sensor in the same time, and on top it's about 2 EUR.
It's the best pick for the job. For the real time clock component it will be PCF8563.
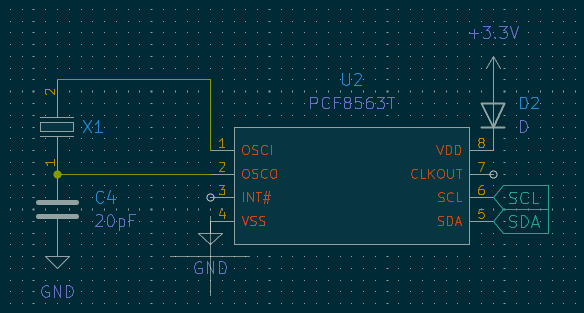
It works over I2C, that means it requires only two wires to connect it to the microcontroller. It's cheap considering other options, PCF8563 is only about 0,5 EUR.
Power:
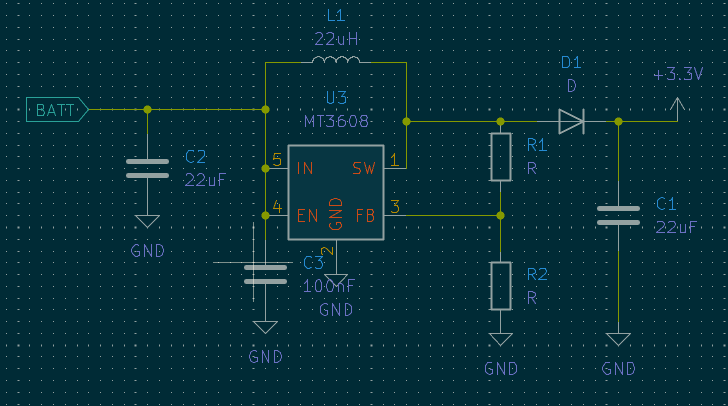
Clock will be powered by two AA batteries. So some kind of voltage regulator needs to be integrated, because two AA batteries in series are 3 volts, and microcontroller needs 3,3 volts constant. A good IC for the job is MT3608, it's small, but still easy to solder, and the price is about 0,08 EUR.
Display:
Epaper display 2,66 inch from a company GoodDisplay.
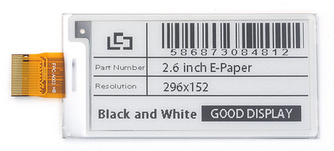
The price stands at 4,55 EUR per unit, that's the most expensive part of the assembly. And the clock will be set with 3 buttons, 3 big buttons at the back of the clock, so it's easy to click them. That's it, can't think of anything else to say.
For the conclusion, the next post will be when PCB will be sent to the manufacturing company, so I can explain in detail how everything is wired. This should be an easy project, considering how I learned from previous failed attempt, and for this time all the components are big enough so accidental solder bridges will be minimized.